I will not get into deep for setting up everything since I did that a couple of months ago and do not remember all the details. I will try to put things here as a basic guideline for myself, just in case I need to setup everything from scratch. Hope it will be useful for others as well.
All instructions below are from GNU ARM Eclipse pages and are covered in much more detail than here. You can just skip reading and go to the Install Page. Also, all below is for Windows. Installation for other OSes is also covered in the Install Page.
- Install the ST-Link V2 device driver. After the installation you should see 'STLink dongle' entry in the Device Manager:

- Download and install GCC for ARM cross compiler. In fact you need no real installer. Just get zip file, extract to some known place (for me it is c:\gcc-arm-none-eabi). No need to adjust path variables, registry, etc. Eclipse will do it for you.
- Download and install OpenOCD. Again, I didn't use any installer package, just extracted archive.
- Download and install JRE. I have got JRE8u91 64-bit. To my surprise Oracle now supplies JRE packages for Windows that do not require install. This is amazing since I hate 'update me forever' puke that was installed by JRE and JDK in previous versions.
Yet again, I have extracted the archive into c:\jre-8 without updating anything.

- I have Cygwin, so I don't need extra build tools for Windows. I just start Eclipse from Cygwin bash and have /cygdrive/c/jre-8/bin in my PATH.
- I didn't install QUEMU
- I have installed ARM plugins as described in the "The Eclipse update site way" section on that page.
- It is very important to follow instructions in "Download CMSIS Packs" section on that page. Otherwise you will not see your processor peripheral's registers while debugging.
- For Eclipse noobs like me it is highly recommended to set-up Workspace Preferences.
- I have installed Eclipse EGit for version control and Github integration
- Sometimes Eclipse does not pass Pause and Stop commands to OpenOCD. I didn't figure yet whether it is a bug or just something wrong in my setup. When this is happen I just connect to OpenOCD (port 4444) with telnet and halt it manually. For that I installed TM Terminal for Eclipse.
- Start Eclipse
- Go to File->New->C Project
- Choose STM32* project and project name:

- Carefully review and select project details offered by the C Project wizard
- Once the project is created, open Project Explorer view (C/C++ perspective), right click on the project and select Properties.
- Go to C/C++ Build->Settings, Devices tab and select the exact chip/board type that you have:

- Build the project. If you created an empty project or a blink sample everything should go smooth.
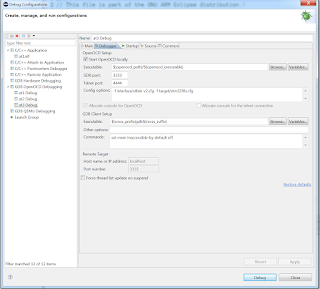
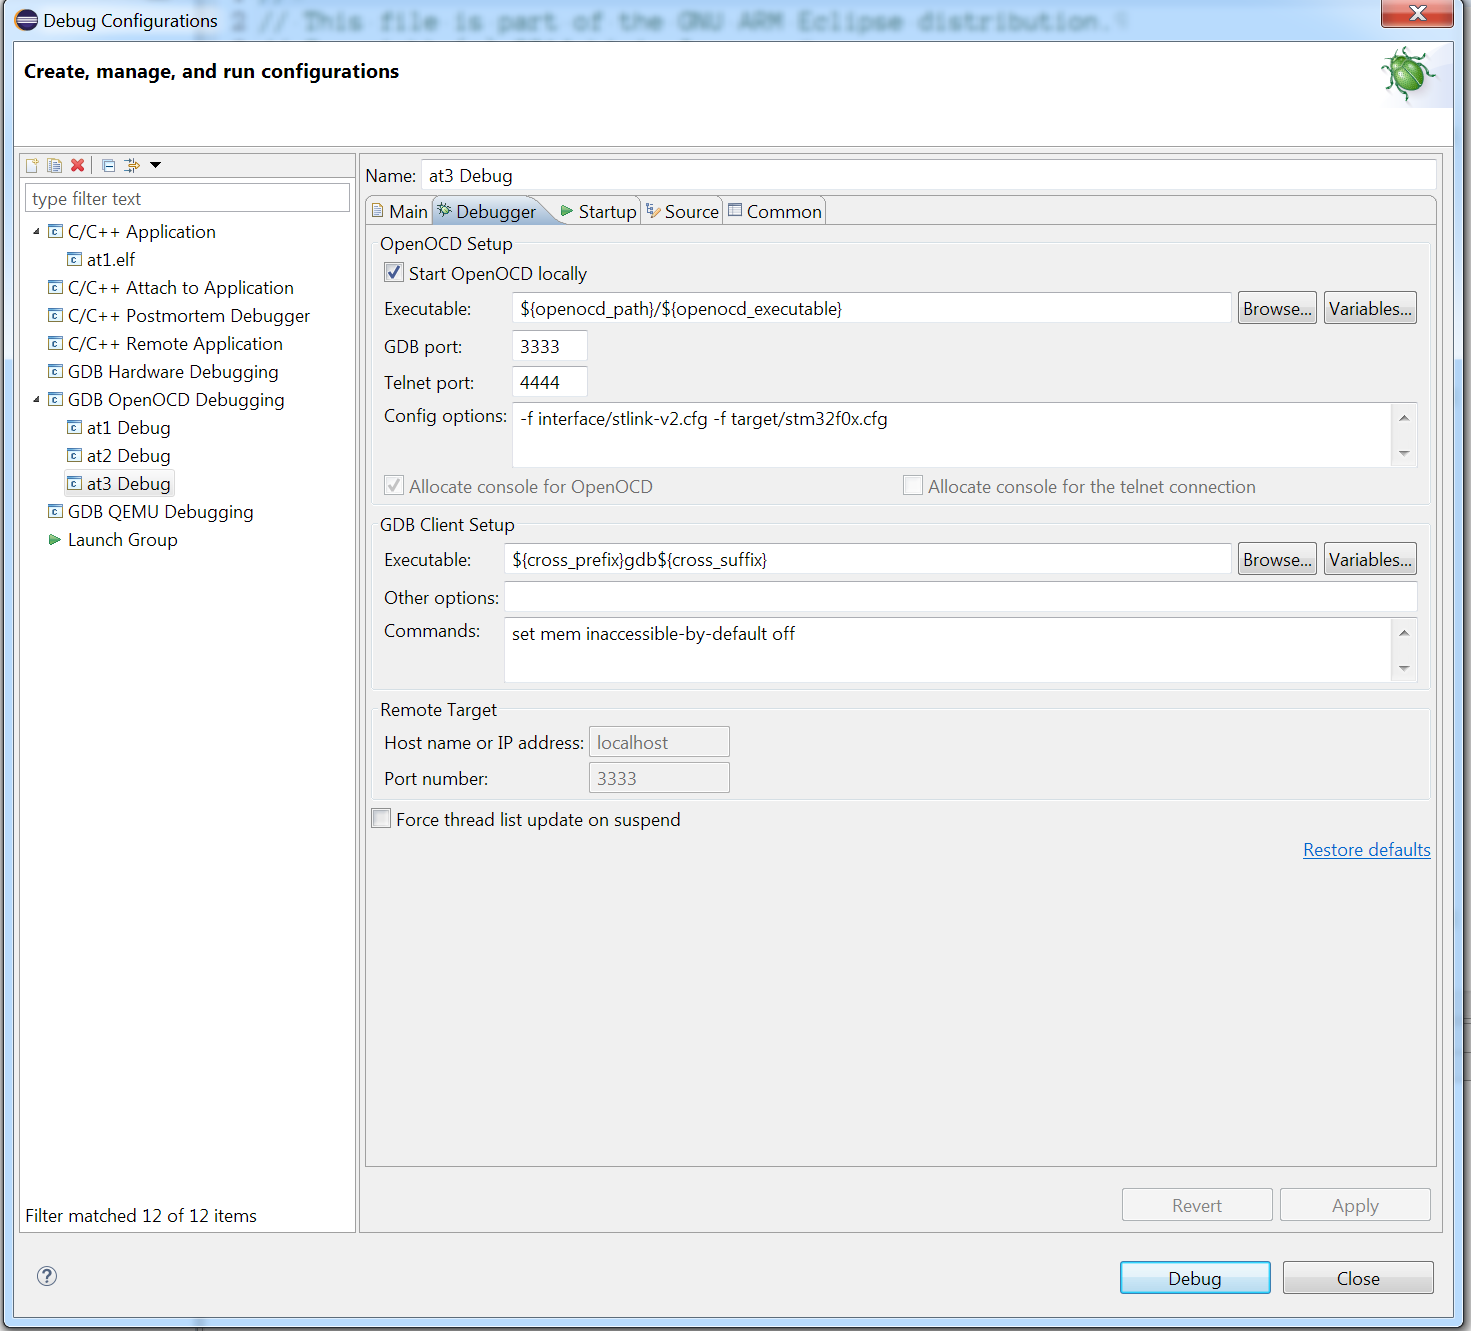
- Go to Run menu->Debug Configurations. Right click on 'OpenOCD Debugging' and choose New.
- Go to Debugger tab and put relevant OCD parameters in Config Options field. For me it is '-f interface/stlink-v2.cfg -f target/stm32f0x.cfg':
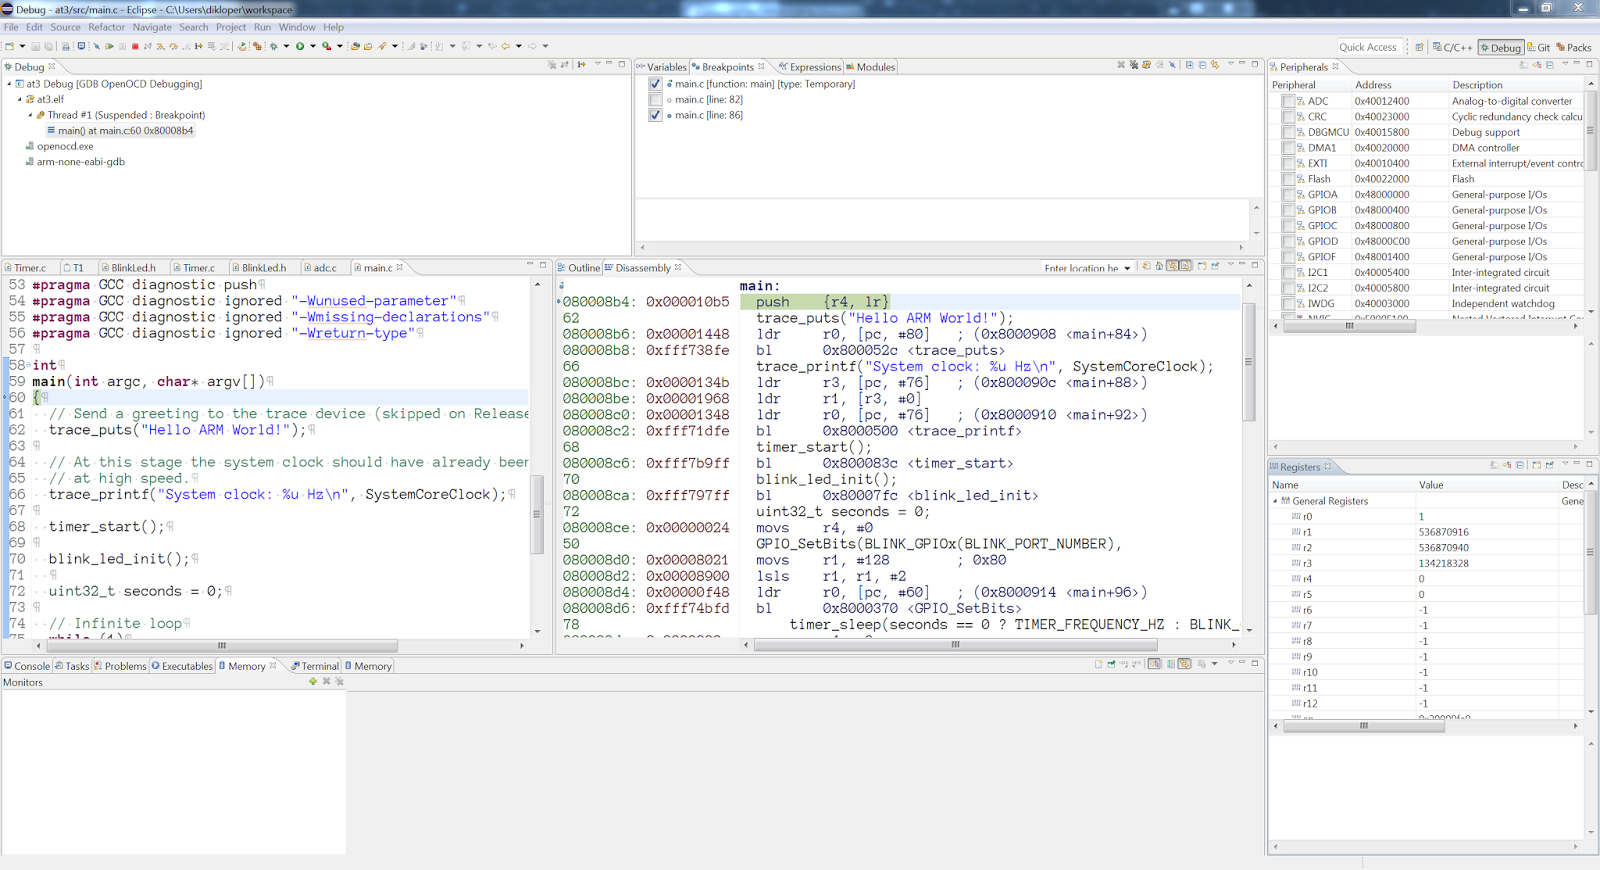
- Click Apply button, connect your chip to STLink, power on and run the configuration. If everything is OK, you will be stopped at your main function and your Registers and Peripherals views will be filled with relevant content. Happy debugging!


No comments:
Post a Comment